10. Syncing Data from the Frontier X/X2 to the Cloud

Fourth Frontier
Last Update منذ ٤ أعوام
To view the complete ECG data and receive insights of a workout recorded on your Frontier X/X2, you need to sync the data on your Frontier X/X2 to the cloud.*
The new BLE sync feature automates this entire process. Once you complete your activity, the sync process will begin in the background and the indicator at the top of your screen will show you the progress. While the sync process is going on, you are free to use the app to view your data.
Here are the steps to Sync your Frontier X/X2 Data to the Cloud:
1. Ensure that your Frontier X/X2 is charged up to at least 20% before initiating a Cloud transfer and downloading your data over Bluetooth.
Important: Before charging your Frontier X/X2, please follow the detailed charging procedure.
2. Connect the Frontier X/X2 to the phone app.
3. If you have any activities on your Frontier X/X2 that haven't been synced yet, the syncing process will begin automatically.
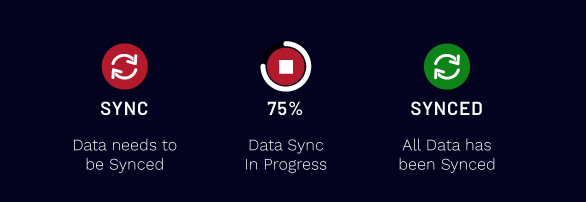
4. The different indicators for Syncing Data are shown below:
5. If you wish to start an activity or record your ECG while the sync process is in progress, a pop-up will appear requesting you to stop the sync process before you proceed. Alternatively, you can choose to “Sync via WiFi” for a faster process.
6. Once your data is synced, you can visit app.fourthfrontier.com, and log in with your credentials to view your ECG as well detailed physiological data.
Alternatively, you could also follow the steps below to initiate a Manual Data Sync over Bluetooth:
1. Ensure that your Frontier X/X2 is charged up to at least 20% before initiating a Cloud transfer and downloading your data over Bluetooth.
2. Connect the Frontier X/X2 to the phone app.
3. Go to "Settings" on the Frontier X app.
4. Under the "Device" section, click on "Sync via Bluetooth"
5. Your data will sync successfully.
6. Once done, you shall receive an email and a push notification on your phone informing you about a successful data sync. Post this email/notification, visit your web dashboard (app.fourthfrontier.com) and all your data should be visible.
Alternatively, you could also follow the steps below to initiate a Manual Data Sync over WiFi:
(Devices shipped out after July 10 2021 are equipped with an upgraded Bluetooth chip. Thus, the option to sync over WiFi is not available to those devices. If you have issues with syncing, please reach out at [email protected])
1. Ensure that your Frontier X/X2 is charged up to at least 20% before initiating a Cloud transfer and downloading your data over WiFi.
2. Connect the Frontier X/X2 to the phone app.
3. Go to "Settings" on the Frontier X app.
4. Under the "Device" section, click on "Sync via WiFi"
5. The app will now prompt you to connect to an access point starting with “4FAP”. Select OK to connect to this access point.
6. After you select “OK”, the file will be fetched over WiFi and stored in your phone’s file system. The file will next be uploaded automatically to the Server, and you will receive an email indicating that your detailed report is available at app.fourthfrontier.com in 3-4 mins.
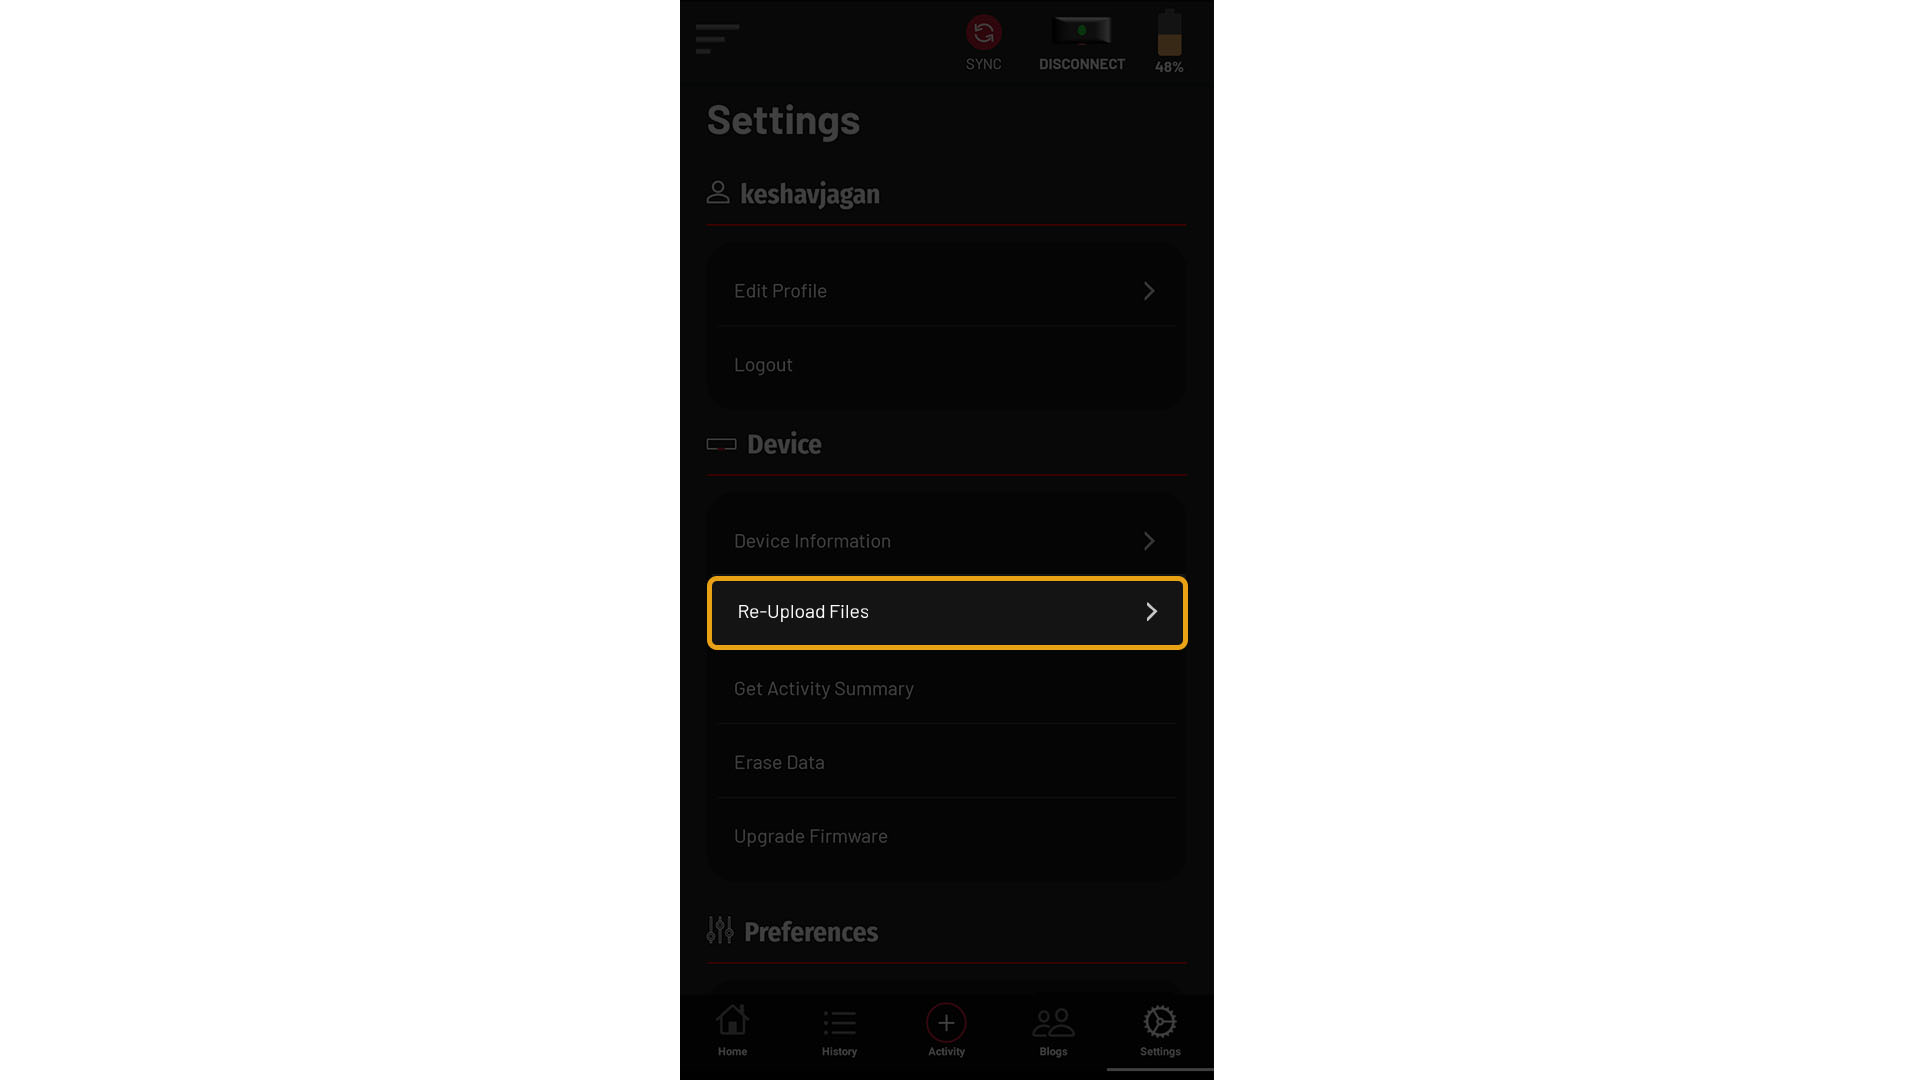
Note: If the file did not get uploaded due to network issues or for any other reason, you can select “Re-upload Files” under “Settings” at any point later, and click on the upload icon next to the file name that you would like to upload. The file names are stored in the format YYYYMMDDHHMMSS_email.bin, where the date and time correspond to the time at which you initiated Sync Data.
Note: Please turn off your VPN before proceeding with the WiFi sync.
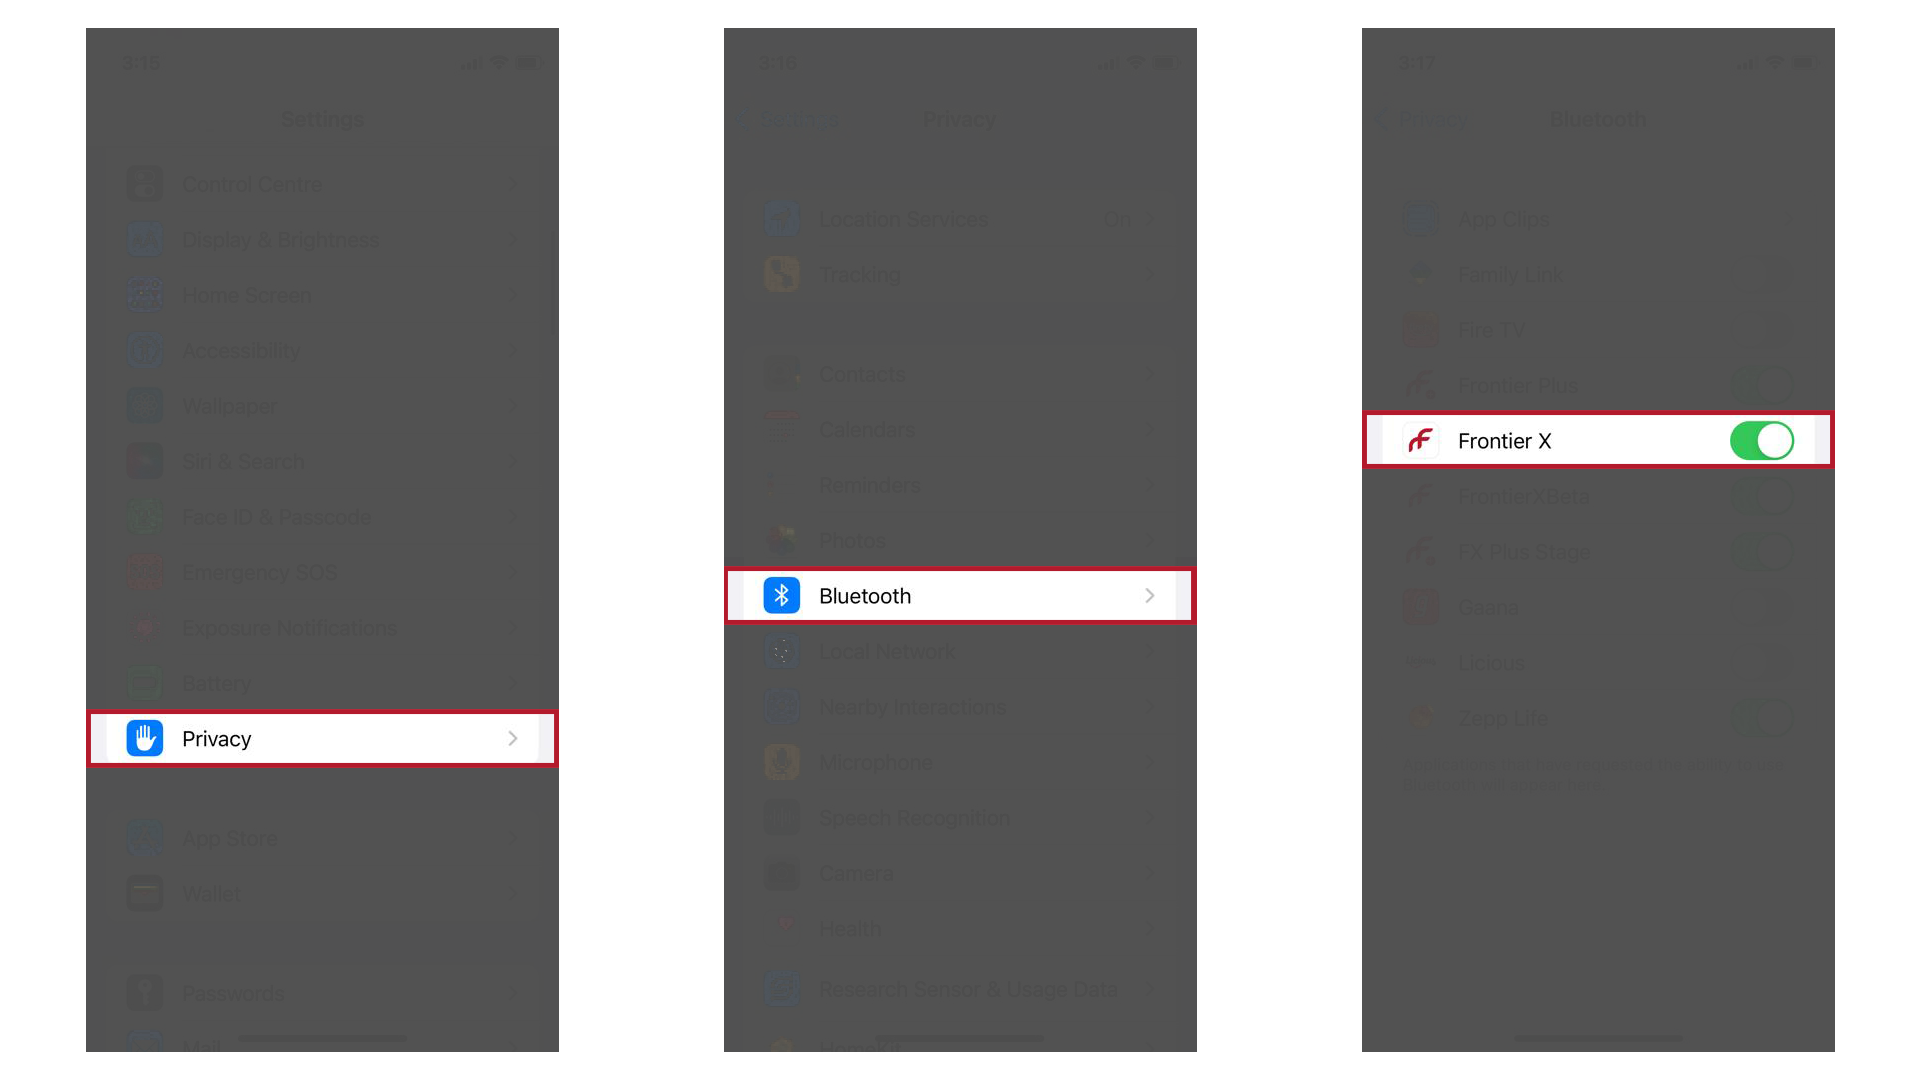
Note: With the introduction of iOS 14, Apple devices now ask for the user's permission before connecting to a local network. In case your iPhone, iPad etc. uses iOS 14, please follow the steps below:
1. Go to Settings > Privacy > Bluetooth
2. Turn the switch for Frontier X/X2 on.